Introduction Last updated: 10/27/2024
Overview
Welcome to BrandPocket Digital Marketplace to Buy or Lease Brands & Domains. BrandPocket is a marketplace which will enable you to Sell or Lease any type of Brand with ease, This tool is not only for a customer to run a marktplace you can also use this to sell or lease the domains or brands that you own by disabling selling tools for other users, This tool has all the features requires to sell/lease your brands starting from DNS/TXT Domain Verification, Bulk Product Uploading & Lease Reminders , Inbuilt Escrow system to make sure that buyer completes the sale by delivering the products as per the agreement, & Lot more tools to sell/ lease smart. Join us for a smarter, safer, and more engaging digital experience. Get ready to experience the ultimate thrill of a sell/lease Brands & Domains ! Explore the following features designed to elevate your experience.
The documentation will help to understand the total system and we have tried to summarize the total process of the site here. This script comes with a very simple but advance user friendly admin panel, user panel which leads to use without any coding knowledge. Additionally, this script comes with in built online payment gateways as well as you can create your own offline payment options from admin panel itself .
We will update this script continuously and come with new features and security patches. We will try to give the best user experience to all of our clients.
Thank you for purchasing BrandPocket. If you have any questions, customizations, developments, modifications or queries that are not answered in this document, please feel free to contact us via email support@onlinetoolhub.com. We will try to respond to you as soon as possible. Thank you so much.
Features
Here are some of the key features that our tool has for you to get started, but our tool isn't limited only to these features it has lot more features in it.
- Sell or Lease Brands / Domains
- Marketplace Tools Included
- Limit Selling tools for selected users
- Bulk product Uploading
- DNS/TXT Domain Ownership Verification
- In Built Escrow System
- User Feedback & Review system
- Charge commisions on each sale
- Sponsor listings system
- User Verification System (KYC)
- Ad system
- Multilingual
- Withdrawal System
- Real time Internal Chat/Message System (With Attcahments)
- SEO Friendly
- Manage SEO Keywords, Title & Meta Details Including Dynamic Title from Admin Panel
- Email Verification
- Dynamic Intrest Installment System
- Real time Internal Chat/Message System (With Attcahments)
- Real time Internal Chat/Message System (With Attcahments)
- Stripe & Paypal Payment Gateways
- Offline Payment System
- User Feedback & Review system
- Wallet system
- Unlimited Pages
- AdSense friendly
- Change Front end Colors from Admin Panel
- Easily customizable
- Page Builder & Editor
- Fully Responsive & Latest Design
- Powerful admin panel
- Powerful user panel
- Real time Push Notifications
- Email notifications
- One Click Installation
- Multiple admin users, roles and user control system
- And lot more features..
Server Requirments
- PHP Version 8.2
- MySQL Version 5.7+ or MariaDB version 10.2+
- BCMath PHP Extension
- Ctype PHP Extension
- cURL PHP Extension
- DOM PHP Extension
- Fileinfo PHP Extension
- GD PHP Extension
- JSON PHP Extension
- Mbstring PHP Extension
- OpenSSL PHP Extension
- allow_url_fopen()
- file_get_contents()
Getting Started
Installation
Our documentation will guide you through step by step, how to configure and install the script according to your requirement, since this script contains an Onlinetoolhub's easy installation setup wizard available you will need only basic details such as database name and password.
Problems to configure your new Script? Or do you have Questions?
We are available 24/7 to help you to get the best from your BrandPocket tool. Send us a message
Upload Contents
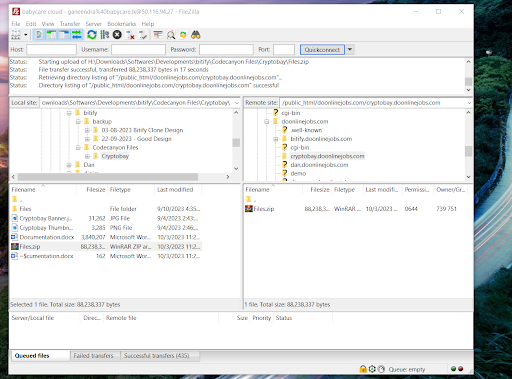
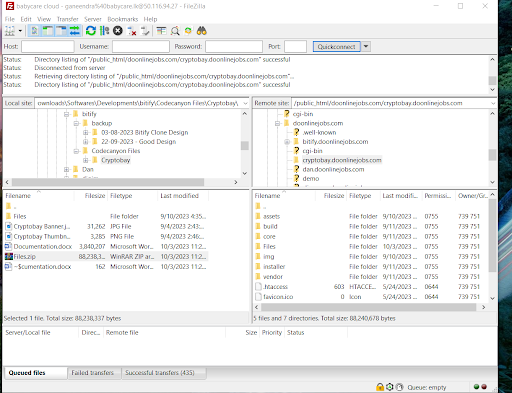
1). Upload the contents of the Files folder to your webserver. You can use FileZila 3rd party software to upload the files to the server if you cannot upload the contents directly from your web uploader.
2). Then Unzip/Extract the File.zip file and move all the contents within File folder to your domain's root folder. Make sure you have moved the index.php and .htaccess as well. and then you can delete File.zip file
Start the installation
3). Now please browse http://your-site-url/install and follow the process. Your system should be ready to use.
Step 2: Minimum Requirments : During installation step 3 our installation setup is checking for basic requirements in order to install the script to your server, you will be able to proceed if you passed the basic script requirements check
Step 3: Set Permissions : During installation step 3 will check folder permissions required to run the application on your server . Please make sure the following permissions are set for following folder paths and all of them are green.
Step 4: Product Activation : During the 4th step you'll be required to activate your product by providing your Envato Purcahse code
Please note The purchase code(license) is for one website or domain only. Please activate the license into the correct domain(URL) to avoid any unwanted issues in the future.
Step 5: Application Setup : During the 5th step you can setup your application enviourment settings & Database settings
Application Setup : Please follow the below steps to setup app environment.
- Please enter your application name / website name
- App URL should be full URL to your website (This will be automatically retrived by the system according to your current URL)
- Please select App Environment as “Production”
- Set App Debug to False
- App Log Level set to Debug
Database Setup : Please follow the below steps to create & setup your database settings required for website.
Create a Database
In order to install the script, you will need a new database. So, during this step we will guide you through the steps of creating a new database in your cPanel.
- Log into cPanel.
- Under Databases, click MySQL Databases.
- In the New Database field, type a name for the database.
- Click Create Database.
- Click Go Back.
- The new database will appear in the Current Databases table.
Next : Now you will need to create a new user to access this database.
Create a Database User
- Log into cPanel.
- Under Databases, click MySQL Databases.
- Click Jump to MySQL Users in the top-right corner of the page.
- Under Add New User, enter a username.
- Enter a password in the Password field.
- For help generating a strong password, click the Generate Password button.
- Retype the password in the Password (Again) field.
- Click Create User
Next : Then you will be required to assign privileges to Database user. Assign Privileges to Database User
- Log into cPanel.
- Under Databases, click MySQL Databases.
- Under Add User to Database, select a user from the User drop-down menu.
- From the Database drop-down menu, select the database to which you wish to allow the user access.
- Click Add.
- From the MySQL Account Maintenance screen, select the privileges you wish to grant the user, or select ALL PRIVILEGES.
- Click Make Changes.
Please note down Database name, Database username & Database password, you will be needing them in the next step.
Provide following details required for database setup.
- Database Connection (Default MySQl)
- Database Server/host: (normally localhost or 127.0.0.1)
- Database Port (Default 3306)
- Database Name
- Database Username
- Database Password
Next : Setup your admin credentails
Final Step : During this step you will be required to create your admin login credentials to login the admin panel. Please enter the following details and proceed. This will complete your installation.
- Admin Login Email
- Admin Login Username
- Admin Login Password
Once you enter these details you may click on the button “Complete Installation”. This will finalize your installation and will also create an admin login for your admin panel.
Finish Installation
We are almost done. Installing process is finish, now you can go to admin panel.
Then Go to: http://www.yoursite-url.com/admin
Installation process is finished. Now you will have to setup General settings, you can do that from your admin panel.
Still have doubts? No worries we will guide you step by step in the next section of the documentation
Walkthrough
We will guide you through the main steps & functionalities of the script for your ease.
Once you completed the installation it is important for you to configure your script's main configuarations in order it to work propely. Most of the functions can be operated from the admin dashboard itself without using Code or Database
General Settings
After the installation in order to run your marketplace there are essential steps to be taken. We will guide you through these important steps through this section of our documentation.
These are the general and main settings of your application
Please Login to admin panel & Go to System > General Settings
Site Operations & Settings
- Domain Ownership Verification : Activate Domain Ownership Verification, Please note if you trun this off current verified listings also will be marked as not verified and owners will have to verify them again when turn this function back on, When this function is off user will not have to verify their domain ownerships while they list them to sell
- Enable Listing Approval Before Go Live : If you have enabled this option all listings will go live only after admin's approval
- Enable Cookie Consent : This will enable cookie consent pop up to the users
- Enable Product Affiliate Buttons : This option will allow sellers to create affiliate buttons for their products. Affiliate buttons will redirect users to another 3rd party website to make the purcahse and earn a commison
- Enable Clear lease Payments : This option will automatically clear all lease payments to sellers as soon as when the payment is made by the buyer without the approval process
- Overdue Reminders Send Before No Of (Days) : Please enter that you want to send reminders to the client when the next payment is due. so client will rceive a reminder regrading the due payment prior to the entered number of days
- Overdue Reminders Send Gap No Of (Days) : If one reminder is already sent to the user next reminder will be sent only after the enetred number of days
- Auto Cancel Order in No Of (Days) : If payments are not completed and due date is passed the entered number of days order will be automatixcally cancelled
- Overdue Reminders Gap No Of (Days) : When the due date is passed and the payment is not yet made user will receive the reminders with the gaps of entered number of days before the Order Cancellation,
Site Theme & Colors
You can change all the colors used in the front end without editing any css or html codes from the admin panel itself.
Not only colors you have the option of creating gradient colors and use them as your website front end colors
Enable selling options for some users only
Sometimes you might need to sell your own domains without running a marketplace (Disable selling tools for other users) For this purpose we have created an option for you to assign seller rights to selected sellers only
- Please Go to System > Sellers
- Now You will see all the users currently registered to your website
- Mark the user by clicking on the button check
Note : If you have selected any user from this list, Seller rights will be reveoked from all teh other users by defult. So if you want to enable seller rights for all the users make sure you diselect all selected users from the list
Scheduler
Make sure your automated tasks runds correctly Go to System > Scheduler
Please add following single cron configuration entry to your server that runs the command every minute.
Currencies
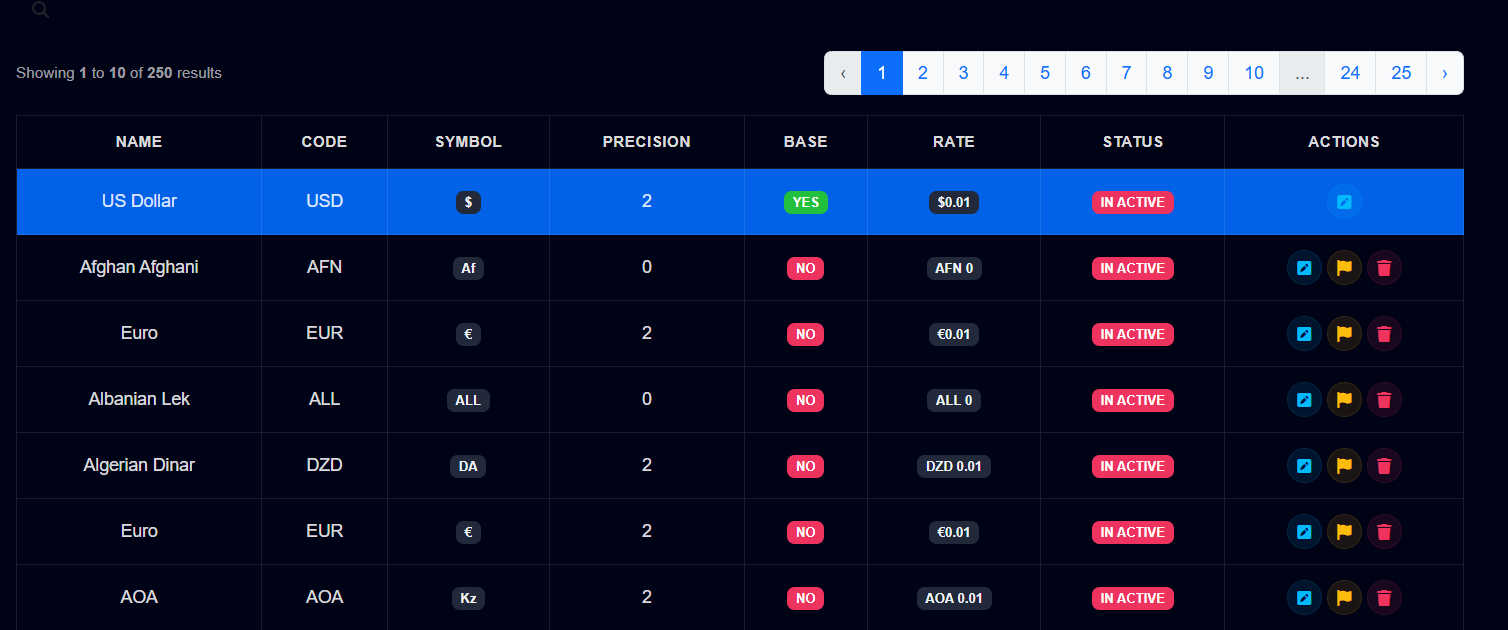
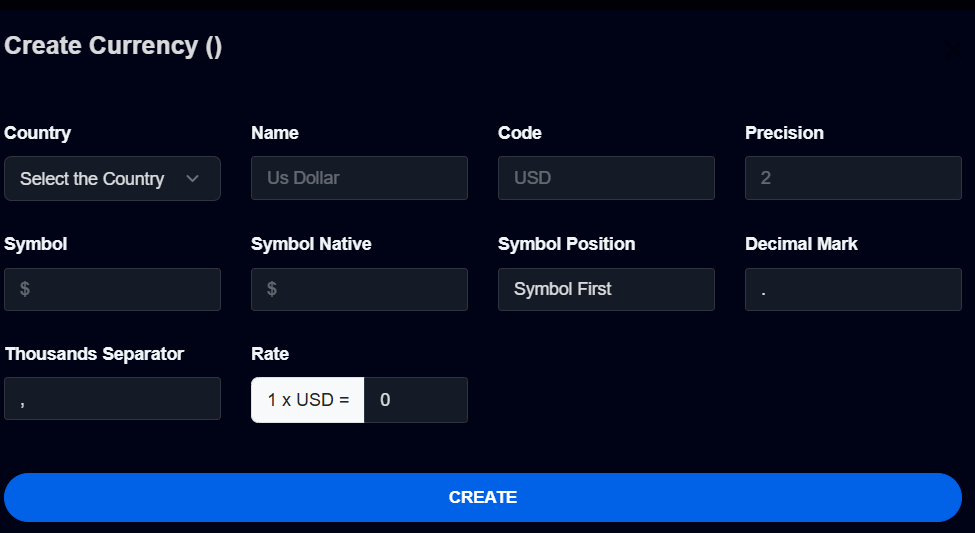
Setup your currecny settings Go to System Tools > Manage Currencies
Note : Please note by default USD will be your base currency and all other currenies will be inactive, Click on the button and activate specific currency in order to use it
- You can set any currency as your default currency by clicking on
- You can edit existing currency by clicking on
Note : Please note when you change the base currency all the other currency rates will be changed againts your base currency
Localization
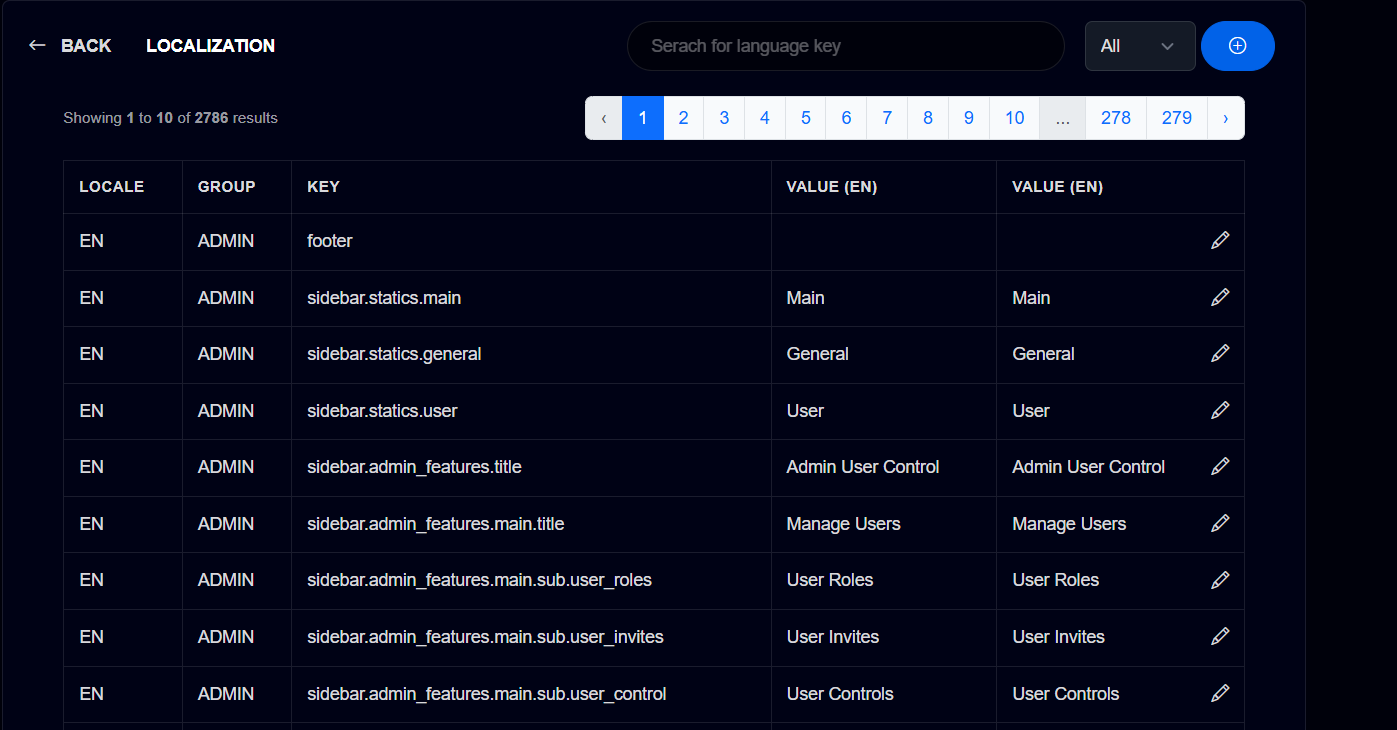
Setup your language settings Go to System Tools > Localization
You have the option to create as much as languages you need, when you create a new language automatically a new language file will be created from our application, Then you can click on the button next to the locale that you want to add/ edit language key
When you access the Locale that you want to edit
- You can simply edit current key value by clicking on
- You can add a new key & a value from
Note : Do not change any contents after :value unless you want to appear a static value, These values are dynamic values
Ads Manager
Create/ Manage Ads Go to System Tools > Ads Manager
You can create ads for following pages & posts from using our Ads Manager
Ad Display Locations
- Blog Left (300px x 250px)
- Blog Landscape (728px x 90px)
- Product Landscape (728px x 90px)
- Product Sides (300px x 250px)
- User Landscape (728px x 90px)
- User Sides (300px x 250px)
Seo Settings
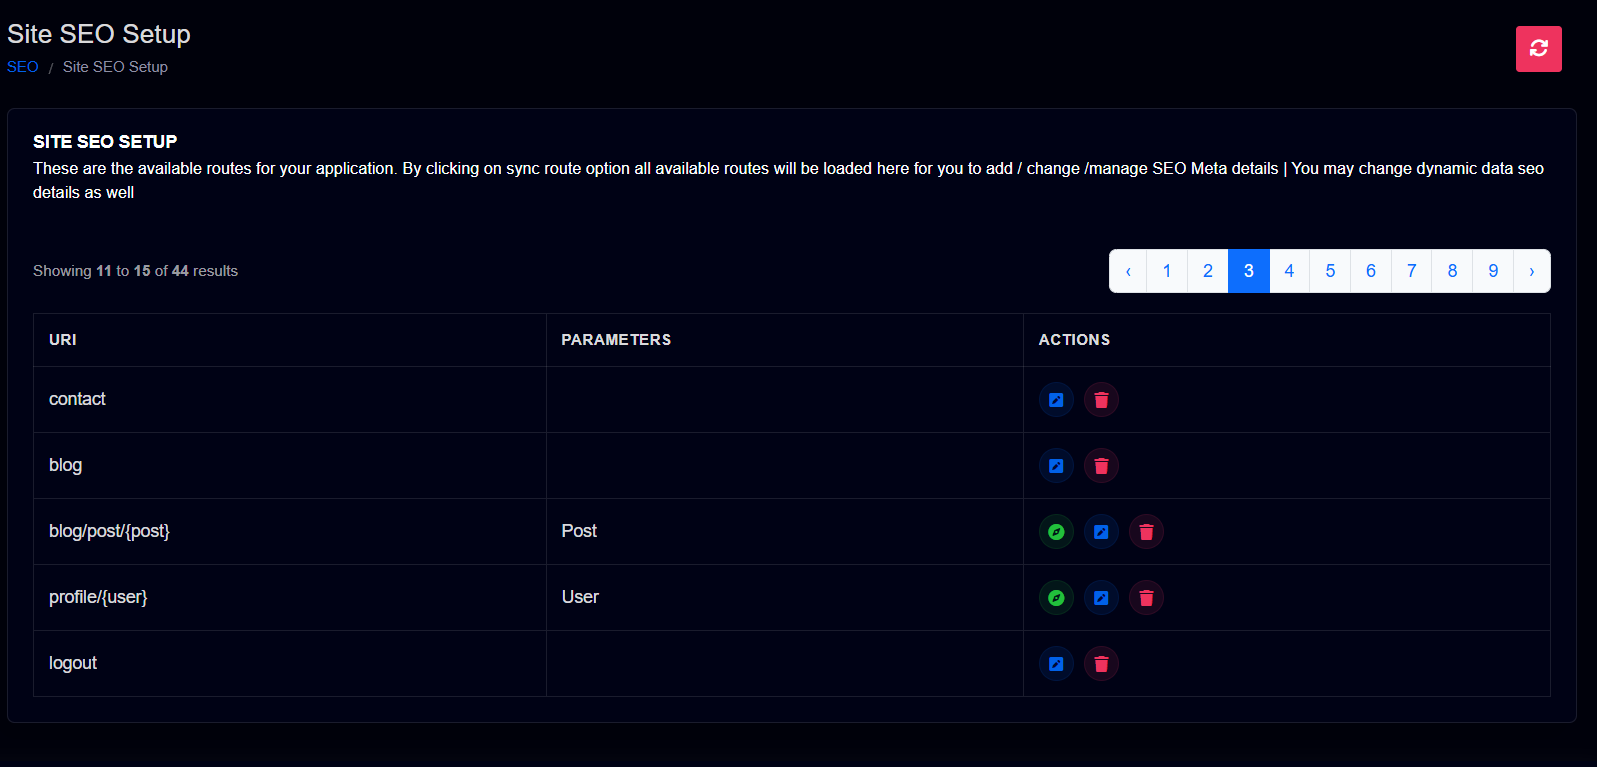
Manage Seo Settings Go to System Tools > Seo Settings
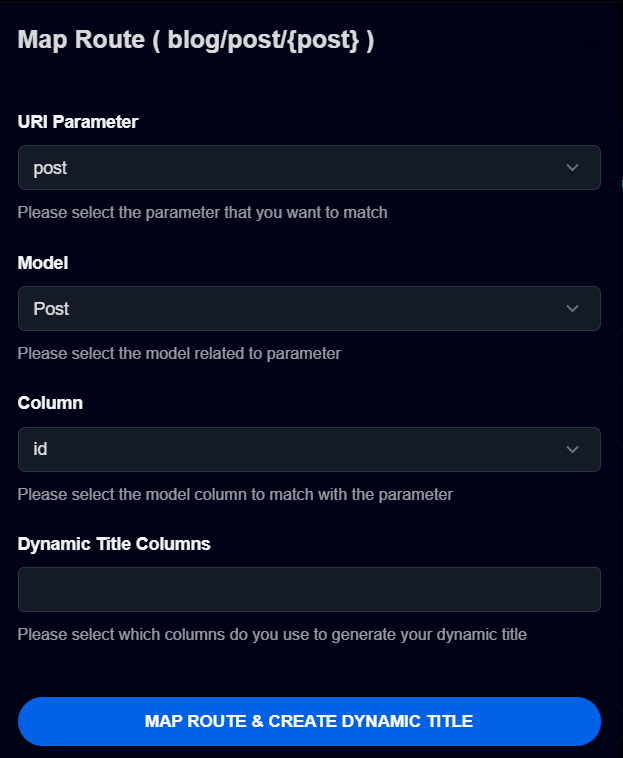
You Can Manage SEO Settings of each page / route from our Seo Manager Our Seo Manager allows you to change static & dynamic page data dynamically according to their data by mapping columns
Mail Settings
Manage Seo Settings Go to System Tools > Mail Settings
it's important to setup your email settings correctly in order to function your website properly, You may setup your email settings with ease by using our email drivers
- Select mail drive SMTP
- Enter Your Mail Drive Name (This could be any unique name)
- Transport (smtp)
- Host
- Port
- Encryption (SSL or TLS)
- Username (Your email id for login)
- Password (Your email password or if you're using gmail this could be your app password)
- From Email (This is your email address)
- From Name (This could be your website name)
HTML Template Builder
Manage Menu Go to System Tools > HTML Templates
Template manager allows you to create or edit current HTMl templates uses within the application, By using this template editor you can create or edit current page HTML Templates without accessing html code files, You can edit template contents by dragging and dropping from the admin panel itself.
Pages Manager
Pages Manager Go to System Tools > Pages Manager
Edit your footer from admin panel itself without accessing database or files
- Create a new template by clicking on
- You can select the HTML template that you created for the page from the HTML Templte dropdown. Once you select the template automatically settings will be saved and template will be applied for the selected page
- Draft the page by clicking on
- You can edit current page settings
Note : Please follow the HTML Template Builder section to checkout how to build templates
Extensions
Pages Manager Go to System Tools > Extensions
Enable , Configure or Disable Extensions
Configure Pusher JS
- Please go to PusherJs and signup, and collect below details from the dashboard which are required for Pusher setup.
- You will require Pusher App ID , Pusher App Key
, Pusher App Secret
- Please click on the button next to PusherJS Extension and Select "Configure" Now enter the data and click on "save"
Note : Pusher JS required for real time notifications & real time message functionalities, So make sure you configure it properly before you go live
Configure Google Recapctha v3
- Please go to Google Recapctha v3 Login to your Google Account or Sign Up, and collect below details from the dashboard which are required for Google Recapctha v3 setup.
- You will require Site Key , Secret
- Please click on the button next to Google Recapctha V3 Extension and Select "Configure" Now enter the data and click on "save"
Note : Google Recapctha v3 will protect your site from scammers and robotic attacks
Notifications
Manage Notifications
To Manage email notifications Go to System Tools >Notifications > Manage Notifications
Enable , Disable, Configure Notifications
- You can change notification boradcasting methods by clicking on
- You can edit email notification by clicking on
|Note : if you have activated boardcasting via email for the notification only this option will be enabled
- You can edit push notification by clicking on
|Note : if you have activated boardcasting via push for the notification only this option will be enabled
- You can create a notification for each order status by clicking on | Note : Please note this option is available only for Order Status Updated Event
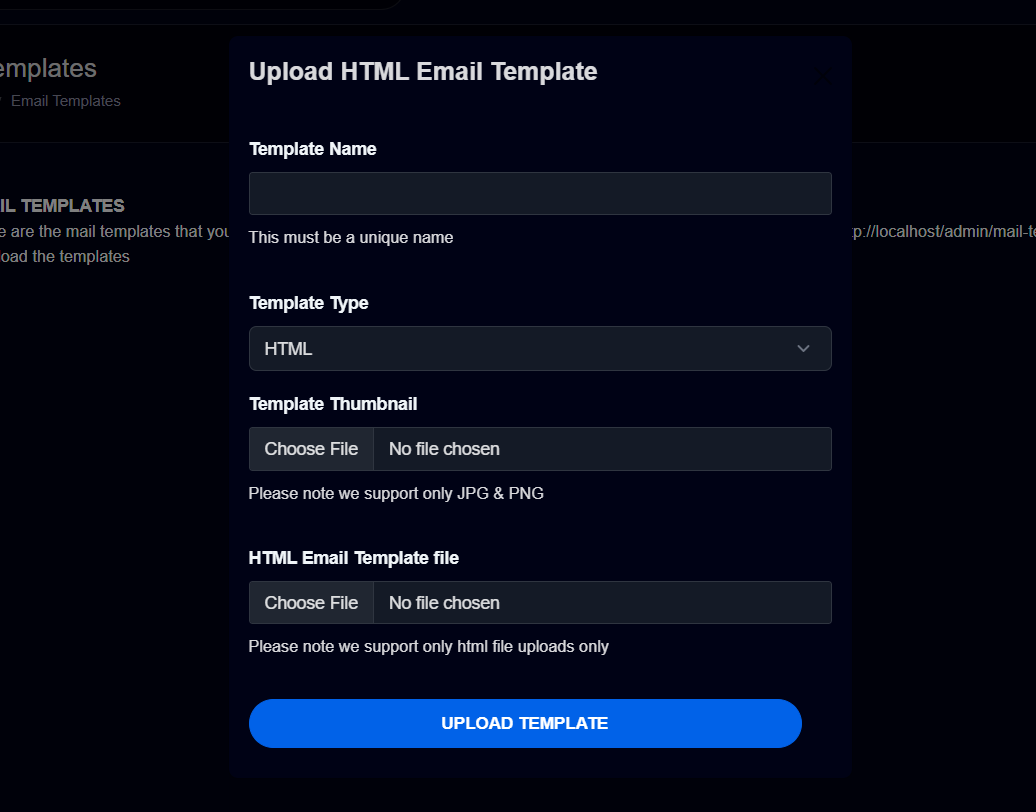
Mail Template
With Holibo admin you can simply your own HTML templates as your Email Notifications, You can upload them and use it for your Email notifications
Walkthrough
Manage Services
Holibo admin allows you to control and set fees & other settings for each services Please go to Site Controls > Manage Services > Products
- Disable service by clicking on
- Activate service by clicking on
- Set lease plans by (This option is available only for lease service) clicking on
- You can edit Service by clicking on
Manage Users
Holibo admin allows super admin to set permissions to the other users who are using your admin panel by creating new roles and assigning permissions to them.
Manage Products
Manage Products
Holibo admin allows to manage your products Go to Site Controls > Manage Products > Products
- View Product by clicking on
- Feature Product by clicking on
- Delete the product by clicking on
- You can edit the product details by clicking on
- Approve product by clicking on
- Revoke Approved product by clicking on
- Mark as a premium product by clicking on
Manage Sale Includes
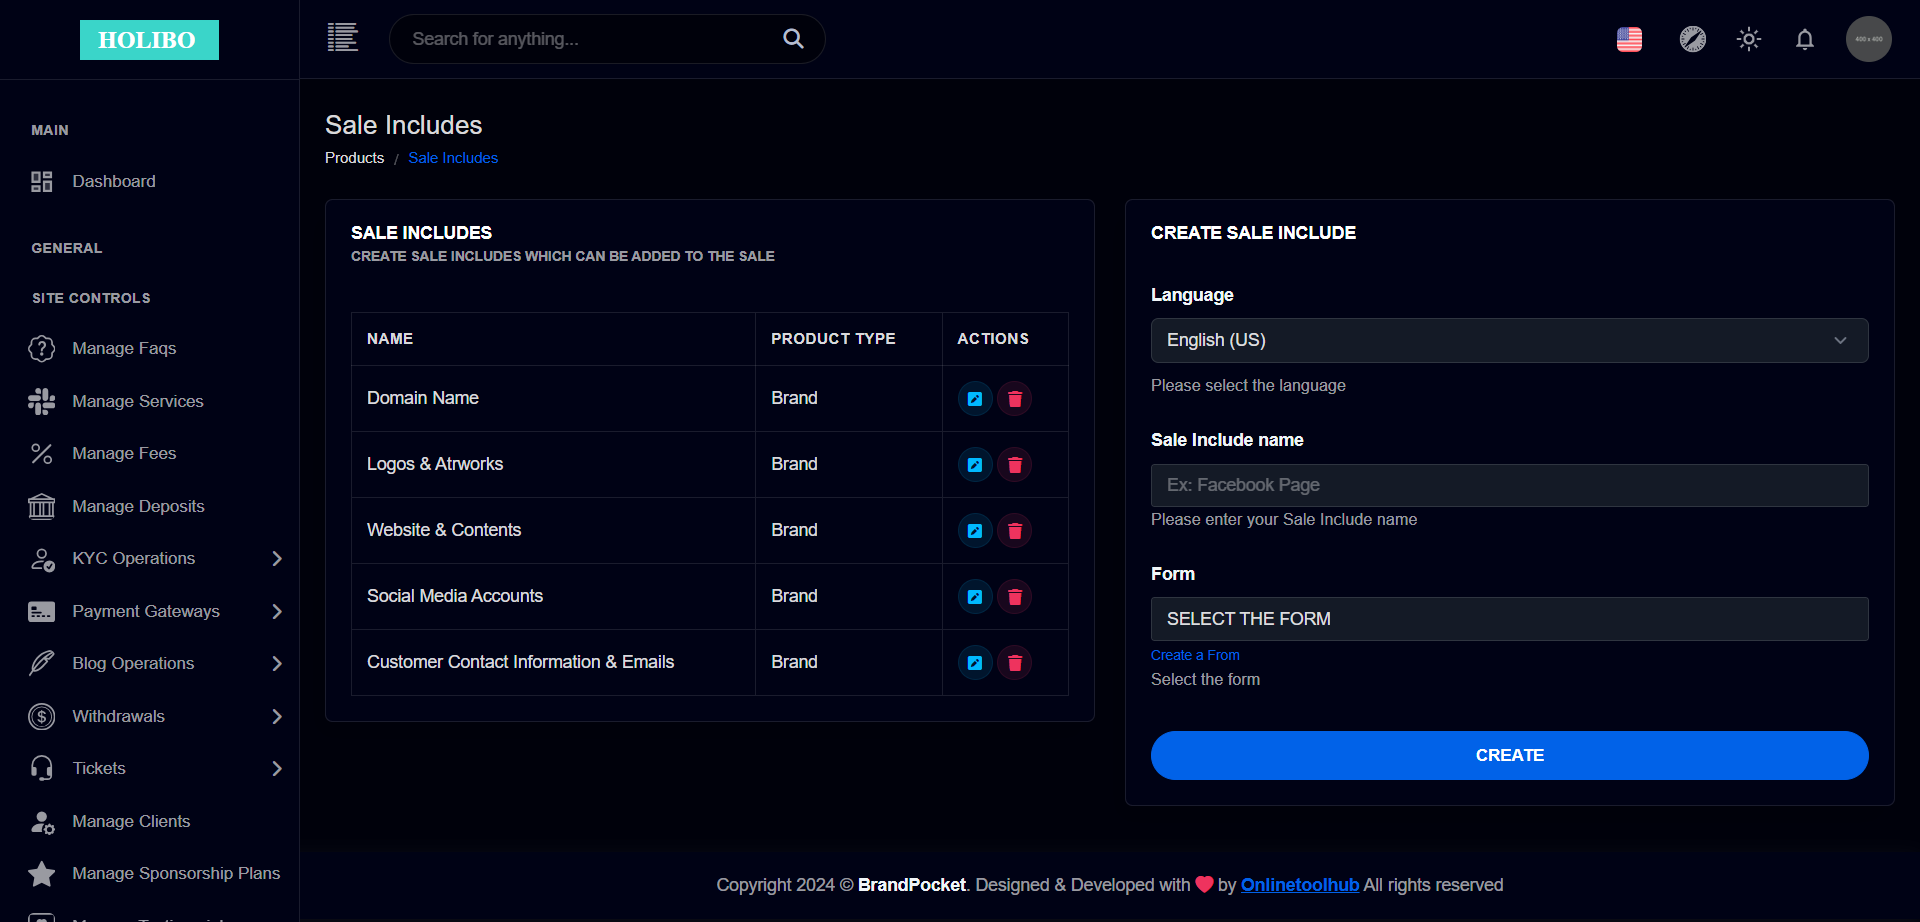
Sale includes are deliverables that a product will have, As an example seller has the option of selling a domain name along with it's contents, customer contacts , social media accounts and etc. These options can be created from Site Controls > Products > Sale Includes
When creating a sale include you have to set a form for each sale include, This form should contains all inputs that seller should provide upon receving an order. As an example : If seller delivering a domain name, That domain transfer requires a Domain Transfer Authorization Code. So you should create a form to accept domain transfer authorization code from form builder and assign it to Domain Sale Includes
Manage Payment Gateways
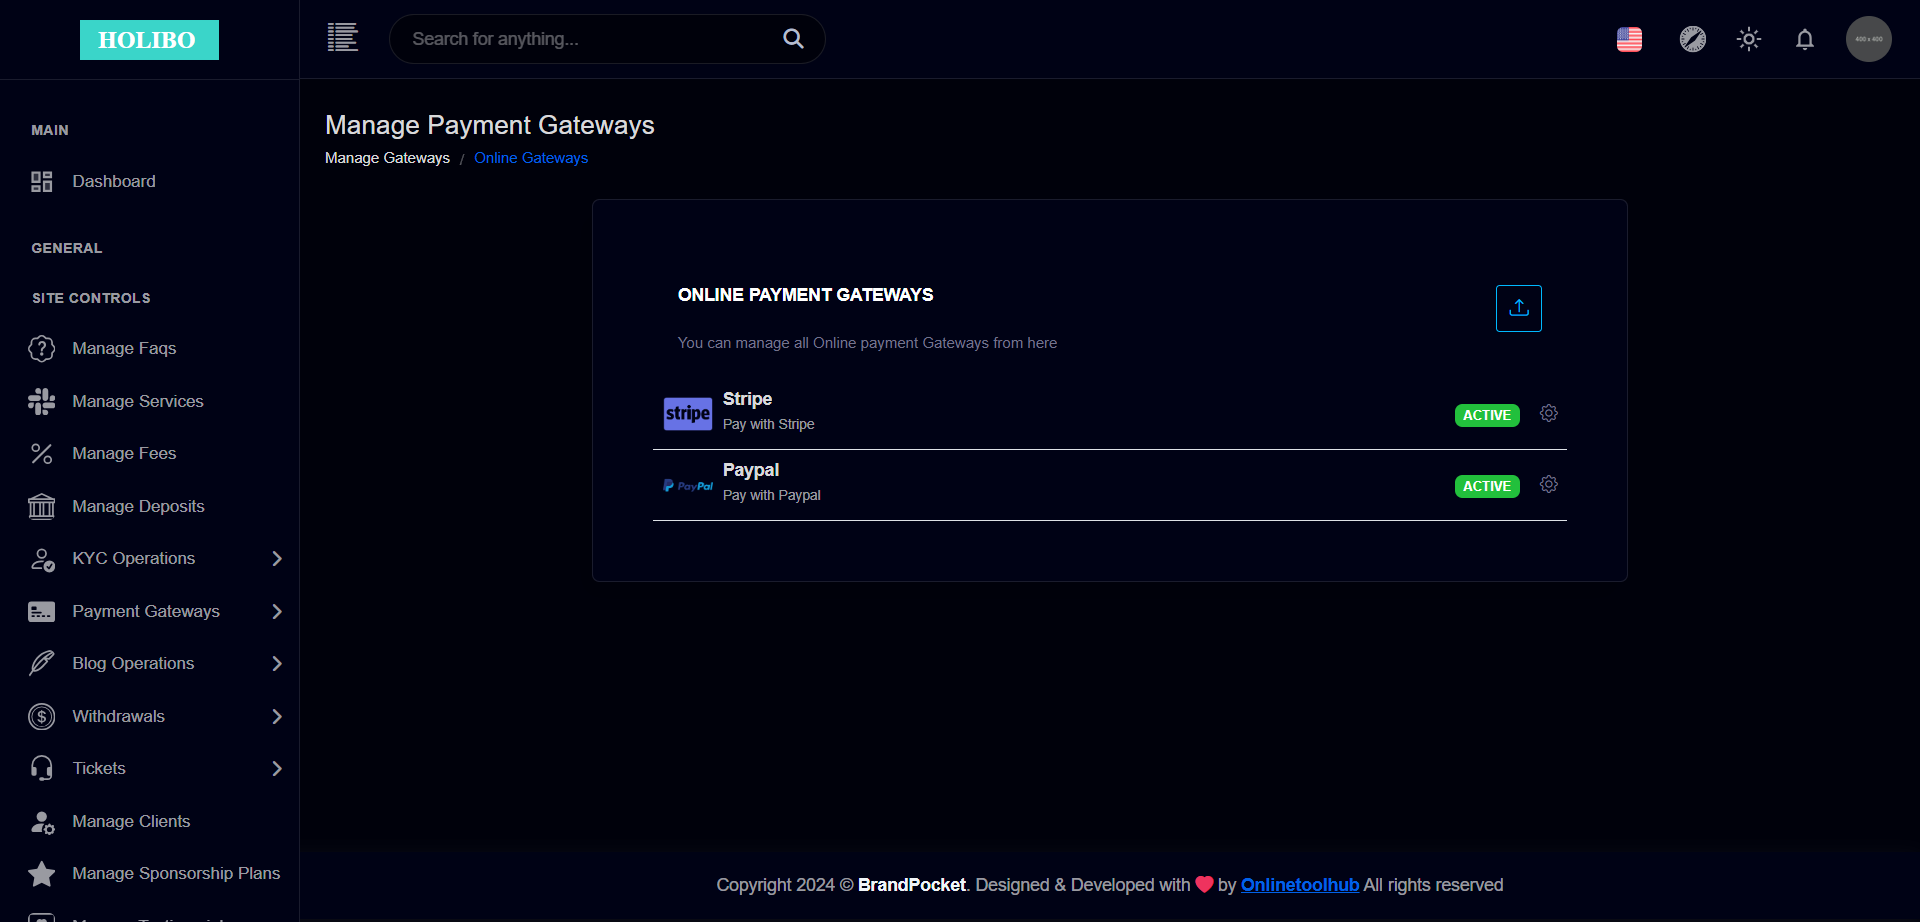
Online Payment Gateways
Online payment gateways are automated gateways Please Go to Site Controls > Payment Gateways > Online Gateways
Configure Stripe
- Please go to Stripe and signup, and collect below details from the dashboard which are required for Stripe setup.
- You will require Stripe Key , Stripe Secret
- Please click on the button next to Stripe Extension and Select "Configure" Now enter the data and click on "save"
Offline Payment Gateways
Manage or Create Offline Payment Modules Please Go to Site Controls > Payment Gateways > Offline Gateways
Manage Orders
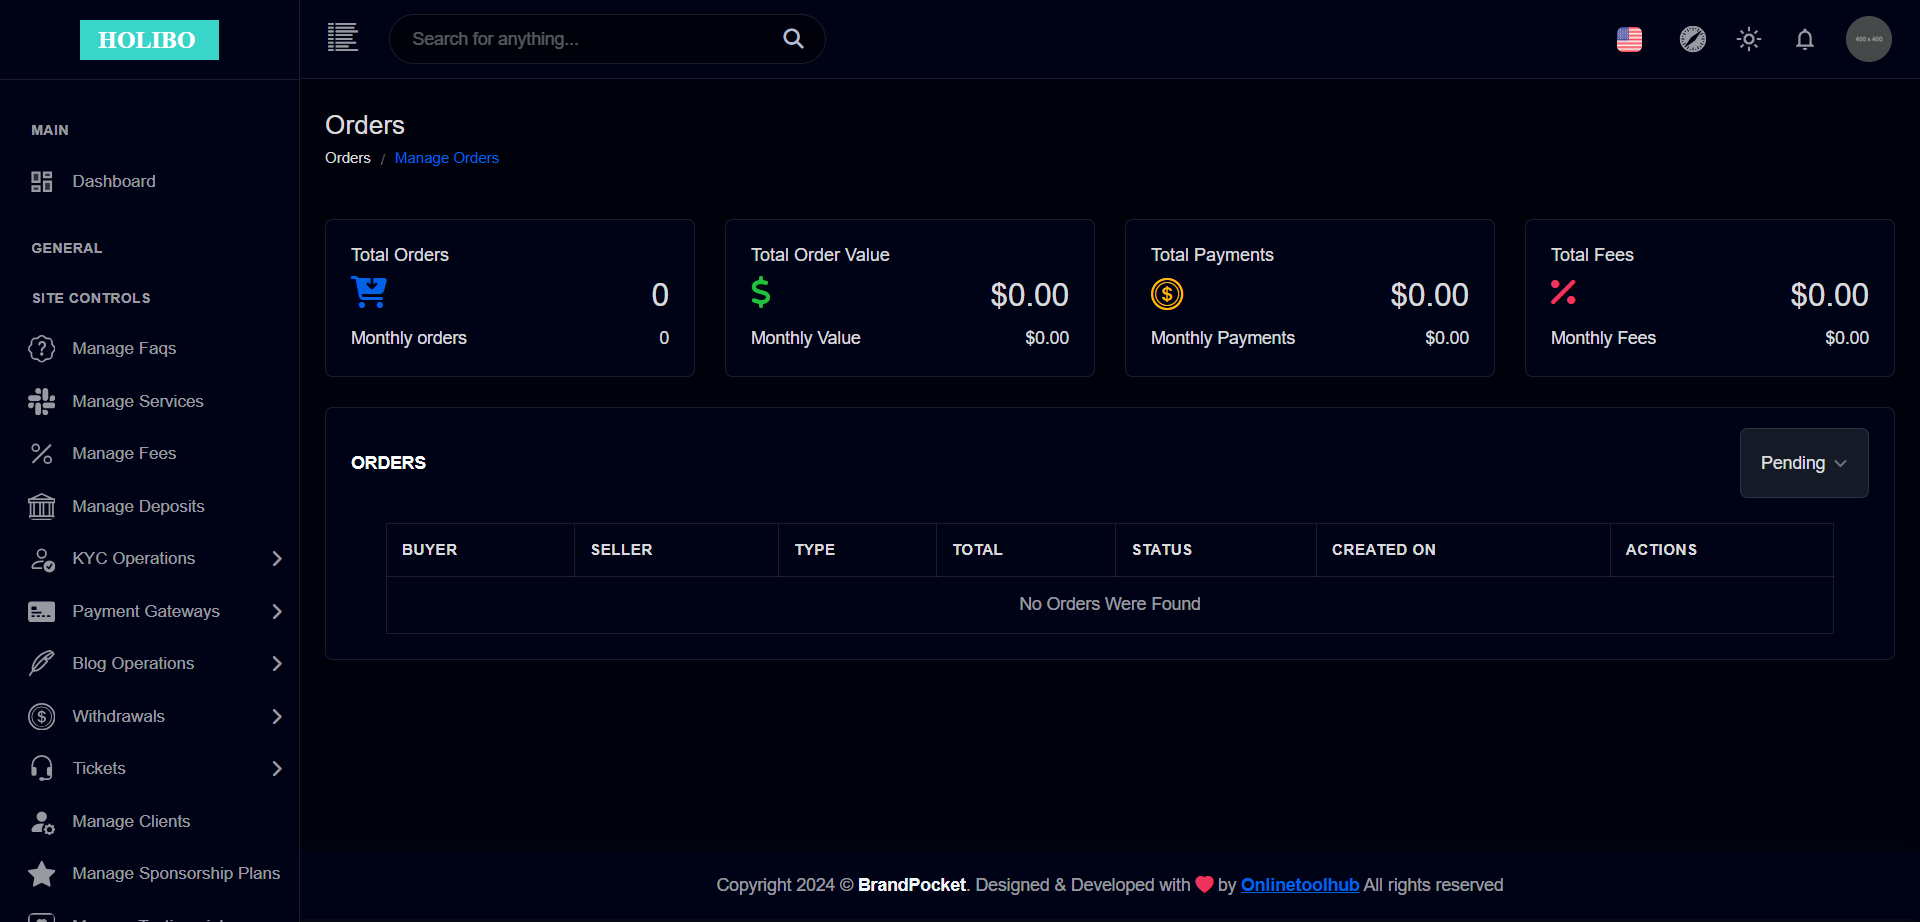
Manage all order via Holibo Admin Please Go to Site Controls > Manage Orders
KYC
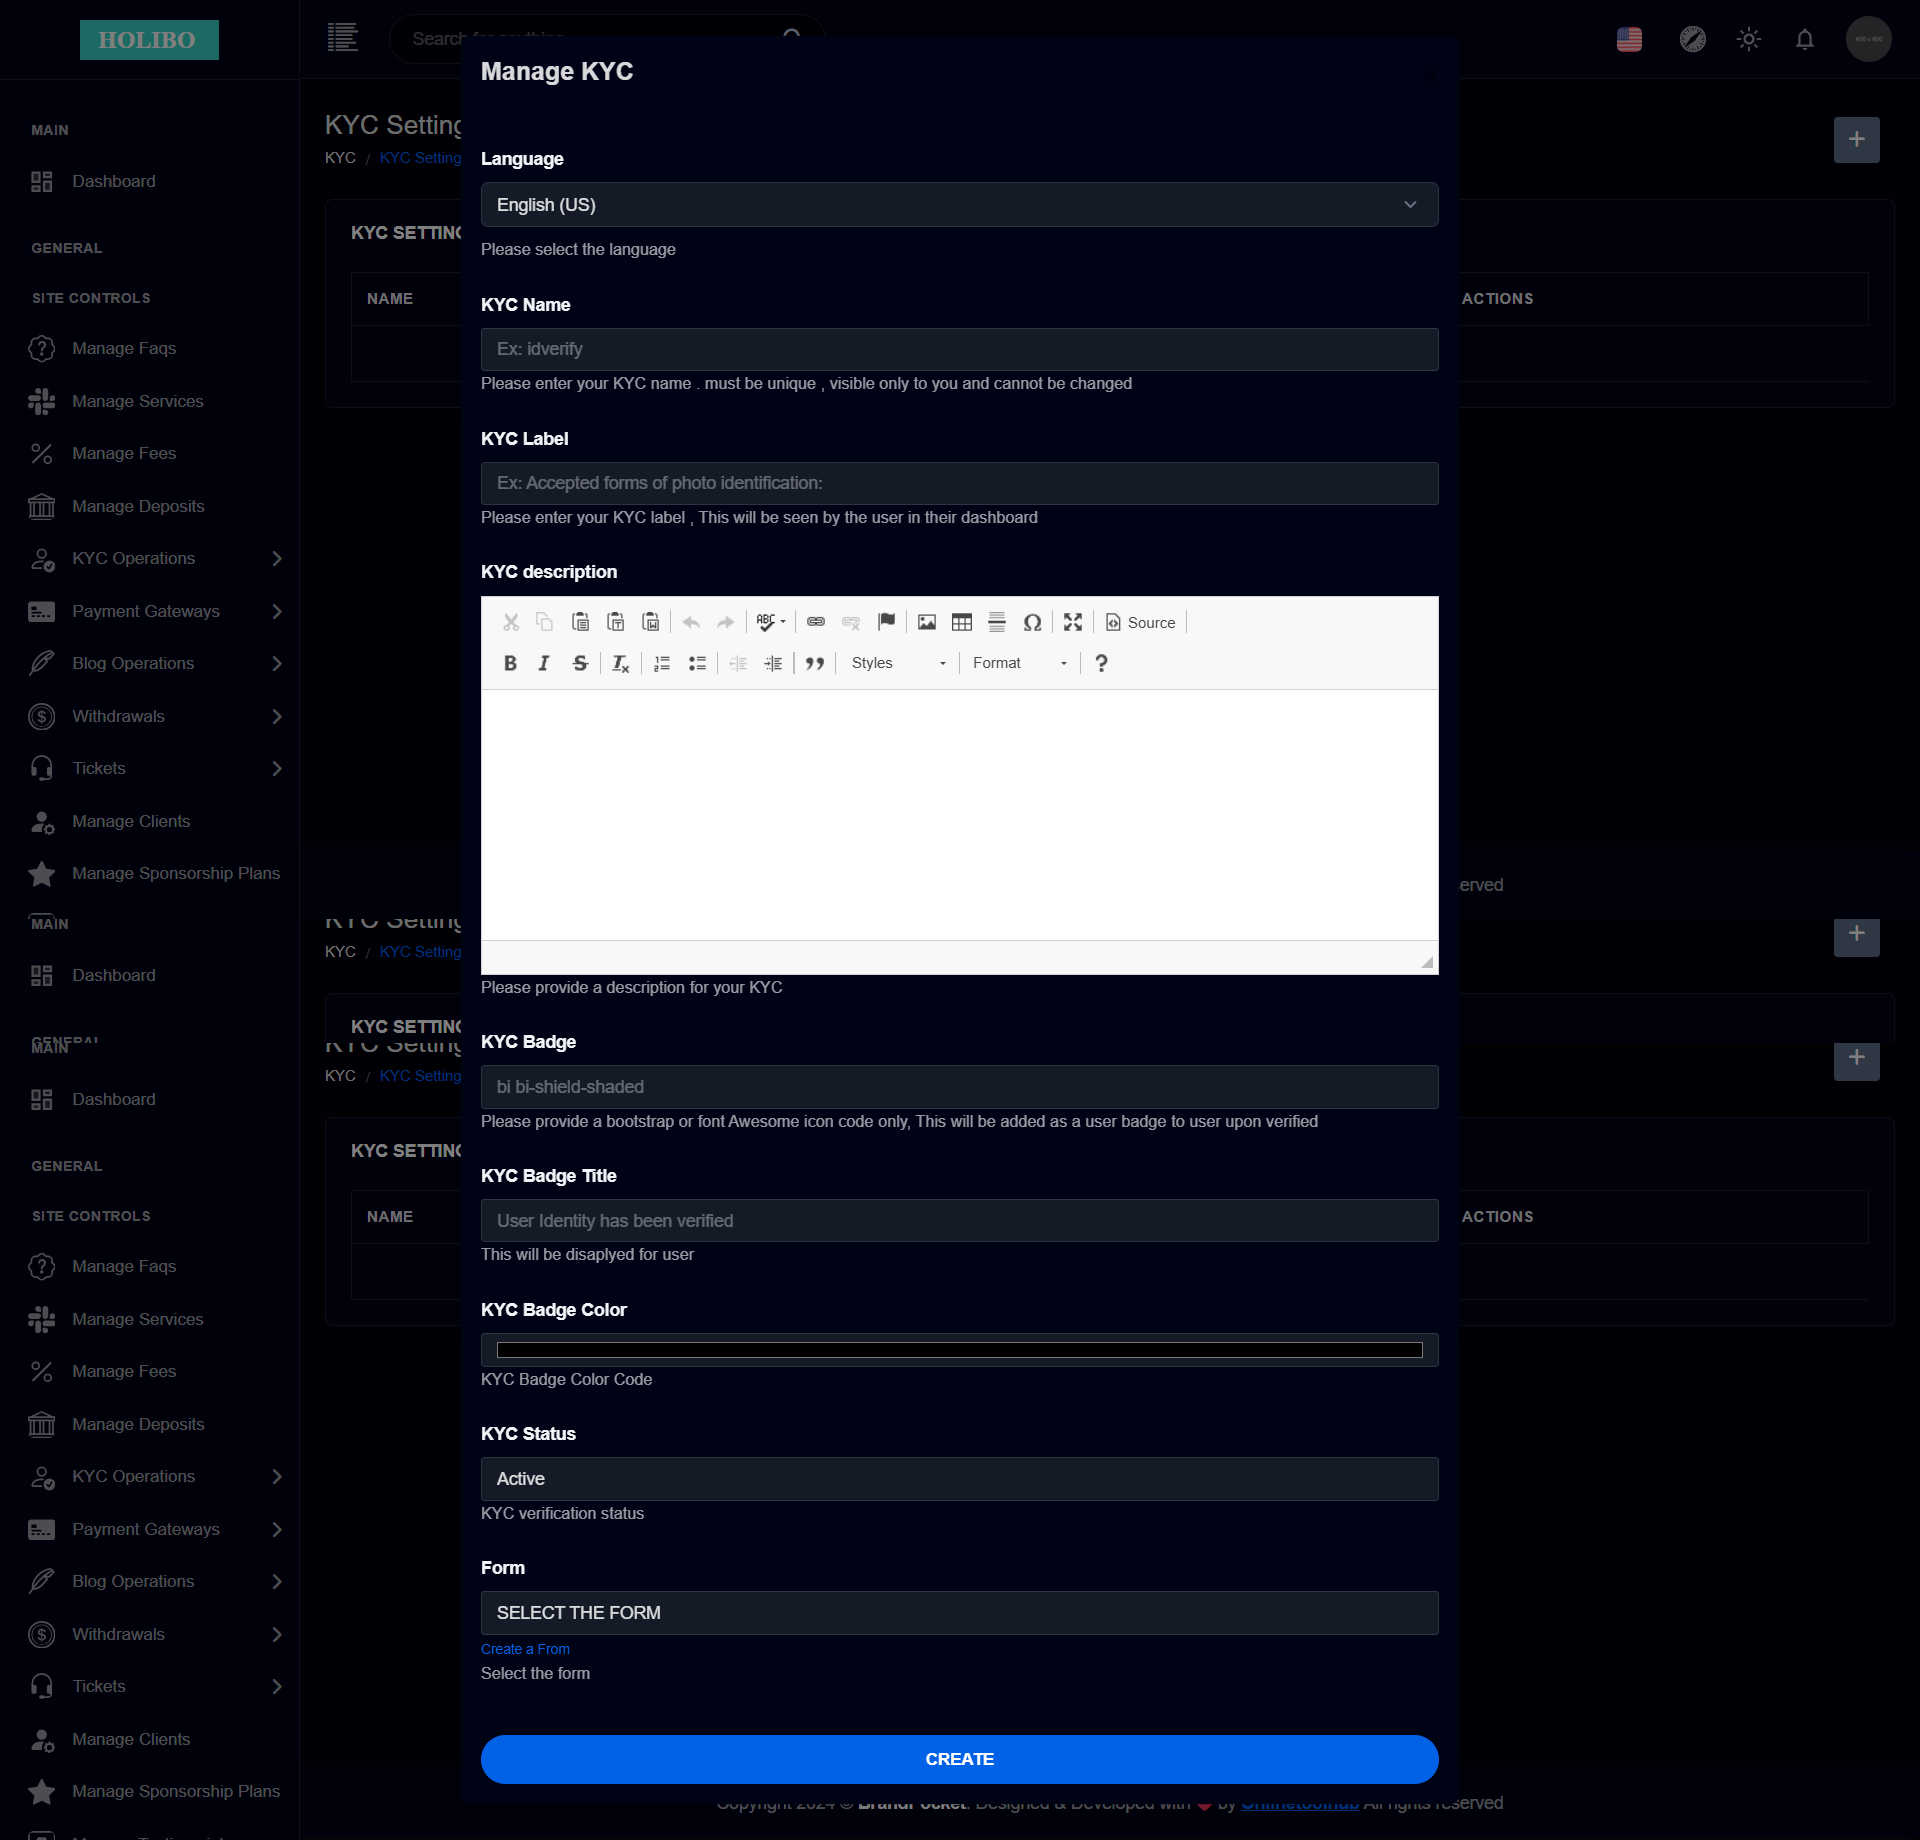
Manage KYC Settings Go to Site Controls > Manage KYC
KYC will allow you to create your own verification methods by creating an own KYC verification method. So user will be asked to submit the requested information via the assigned form. Once the submission is completed admin will have the option to accept or reject these inputs
User Dashboard
Our User friendly responsive User Dashboard is designed for users. Users can manage everything on their dashboard like managing their brands listing, sponsor them, Chat/Message system & others. They will be able to complete orders, view orders and manage orders, can withdraw their funds, support tickets & etc.
Faqs
We get following questions frequently.
Do I need VPS or a Dedicated server to run this system?
No, You can run this system in a shared host as well and it will run smoothly. But if you have much traffic, you may need to upgrade your server/hosting. Our codes are highly optimized to ensure the best possible performance.
Can i sell my domains by disabling selling features for other users?
Yes, you can , you can enable selling tools only for some users by disabling selling option for other customers
Does this have an escrow system?
Yes, We have built an in built escrow system to make a safe enviorment between buyers and sellers
How does lease works?
Buyer will select a lease plan and will make the first installment, Then seller will be notified and admin will ask seller to transfer assets to admin, then admin will mark the delivery as received and then buyer will be able to continue with the lease payment on each months untill lease completed, once the lease is completed assets will be transfred to Buyer by the admin and mark the order as completed
Support
Thank you
We would like to thank you for purchasing our script.
If you have done everything right your website should be up and running.!!
If you still have questions, you can contact us through our email address
support@onlinetoolhub.com| and we will get back to you within 24 Hours .
